1.getElementsByName():獲取name.
~~~~~~~~~~~~~~~~~~~~~~~~~~~~~~~~~~`
例:
<p name="pn">hello</p>
   <p name="pn">hello</p>
   <p name="pn">hello</p>
   <script>
       function getName(){
                  var count=document.getElementsByName("pn");
                  alert(count.length);
                  var p=count[2];
                  p.innerHTML="world";
          }
   </script>
結果:界面打印出三個hello,並且伴有一個提示框“3”,當點擊確定後,界面顯示的內容變為hello hello world
~~~~~~~~~~~~~~~~~~~~~~~~~~~~~~~~~~~~~~~~~~~~~~~~~··
2.getElementsByTagName():獲取元素。
~~~~~~~~~~~~~~~~~~~~~~~~~~~~~
例
<p>hello</p>
   <p>hello</p>
   <p>hello</p>
   <script>
       function getName(){
                  var count=document.getElementsByTagName("p");
                  alert(count.length);
                  var p=count[2];
                  p.innerHTML="world";
          }
   </script>
結果:界面打印出三個hello,並且伴有一個提示框“3”,當點擊確定後,界面顯示的內容變為hello hello world
~~~~~~~~~~~~~~~~~~~~~~~~~~~~~~~~~~~~~~~~~~~~~~~~~~
3.getAttribute():獲取元素屬性。
~~~~~~~~~~~~~~~~~~~~~~~~~~~~~~~~~~
例
<a id="aid" title="得到a的標簽屬性"></a>
   <script>
           function getAttr1(){
               var anode=document.getElementById("aid");
               var attr=anode.getAttribute("id");
               alert("a的ID是:"+attr);
            }
           function getAttr2(){
              var anode=document.getElementById("aid");
              var attr=anode.getAttribute("title");
              alert("a的title內容是:"+attr);
           }
            getAttr1();
            getAttr2();
  </script>
結果:彈出提示框“a的ID是:aid”.點擊確定後,彈出提示框“a的title內容是:得到a的標簽屬性”。
~~~~~~~~~~~~~~~~~~~~~~~~~~~~~~~~~~~
4.setAttribute()設置元素屬性。
~~~~~~~~~~~~~~~~~~~~~~~~~~~~~~~~~~~~
例
<a id="aid2">aid2</a>
   <script>
        function setAttr(){
           var anode=document.getElementById("aid2");
           anode.setAttribute("title","動態設置a的title屬性");
           var attr=anode.getAttribute("title");
           alert("動態設置的title值為:"+attr);
       }
       setAttr();
   </script>
結果:彈出提示框“動態設置的title值為:動態設置a的title屬性”。
~~~~~~~~~~~~~~~~~~~~~~~~~~~~
5.childNodes():訪問子節點。
~~~~~~~~~~~~~~~~~~~~~~~~~~··
例
<ul><li>1</li><li>2</li><li>3</li></ul>
   <script>
           function getChildNode(){
                var childnode=document.getElementsByTagName("ul")[0].childNodes;
                alert(childnode.length);
                alert(childnode[0].nodeType);
           }
          getChildNode();
  </script>
結果:界面打印出.1 .2 .3彈出對話框“3”,按確定後彈出“1”。
~~~~~~~~~~~~~~~~~~~~~~~~~~~~~~~~~~~~~~~~
6.parentNode():訪問父節點。
~~~~~~~~~~~~~~~~~~~~~~~~~~~~~~~~·
例
<div>
        <p id="pid"></p>
   </div>
   <script>
        function getParentNode(){
            var div=document.getElementById("pid");
            alert(div.parentNode.nodeName);
        }
       getParentNode();
  </script>
結果:彈出提示框:DIV.
~~~~~~~~~~~~~~~~~~~~~~~~~~~~~~~~~~
7.createElement():創建元素節點。
~~~~~~~~~~~~~~~~~~~~~~~~~~~~~~~~
例:
 <script>
       function createNode(){
             var body=document.body;
             var input=document.createElement("input");
             input.type="button";
             input.value="按鈕";
             body.appendChild(input);//插入節點
        }
         createNode();
 </script>
結果:出現一個按鈕。
~~~~~~~~~~~~~~~~~~~~~~~~~~~
8.createTextNode():創建文本節點。
~~~~~~~~~~~~~~~~~~~~~~~~~~~~~~
例:
    <script>
        function createNode(){
              var element = document.createElement("div");
              element.className = "message";
              var textNode = document.createTextNode("Hello world!");
              element.appendChild(textNode);
              document.body.appendChild(element);
        }
      createNode();
   </script>
代碼分析:這個例子創建了一個新<div>元素並為它指定了值為“message”的class特性。然後,又創建了一個文本節點,並將其添加到前面創建的元素中。最後一步,就是將這個元素添加到了文檔中的<body>元素中,這樣可以在浏覽器中看到新創建的元素和文本節點了。
結果:頁面顯示hello world。
~~~~~~~~~~~~~~~~~~~~~~~~~~~~~~~~~~~~~~~~~~~
9.insertBefore():插入節點。
~~~~~~~~~~~~~~~~~~~~~~~~~~~~~~~~
例
<div id="div">
          <p id="pid">p元素</p>
    </div>
    <script>
        function addNode(){
             var div=document.getElementById("div");
             var node=document.getElementById("pid");
             var newnode=document.createElement("p");
             newnode.innerHTML="動態插入一個p元素";
             div.insertBefore(newnode,node);
        }
        addNode();
    </script>
結果:界面打印出:動態插入一個p元素
p元素
~~~~~~~~~~~~~~~~~~~~~~~~~~~~~~~~~~~~~~~
10.removeChild():刪除節點。
~~~~~~~~~~~~~~~~~~~~~~~~~~~~~·
例
<div id="div">
          <p id="pid">p元素</p>
    </div>
    <script>
       function removeNode(){
               var div=document.getElementById("div");
               var p=div.removeChild(div.childNodes[1]);
        }
      removeNode();
   </script>
結果:界面什麼也沒顯示。
~~~~~~~~~~~~~~~~~~~~~~~~~~~~~~~~~~~
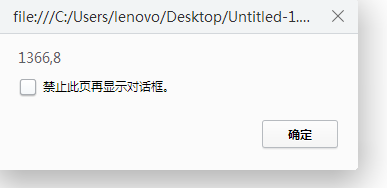
11.offsetHeight:網頁尺寸
12.scrollHeight:網頁尺寸
~~~~~~~~~~~~~~~~~~~~~~~~~~~·
例:
  <script>
      function getSize(){
          var width=document.documentElement.offsetWidth||document.body.offsetWidth;//解決兼容問題
          var height=document.documentElement.offsetHeight||document.body.offsetHeight;
          alert(width+","+height);
      }
      getSize();
 </script>
顯示結果:
這篇文章主要介紹了JS DOM 來控制HTML元素,文章內容主要包括關於DOM,HTML等,文章來自網絡,請參考。