在最近的項目中,為了便於分析把項目的日志都存成了JSON格式。之前日志直接存在了文件中,而MongoDB適時闖入了我的視線,於是就把log存進了MongoDB中。log只存起來是沒有意義的,最關鍵的是要從日志中發現業務的趨勢、系統的性能漏洞等。之前有一個用Java寫的分析模塊,運行在Tomcat下。實現相當的重量級,添加一個新指標的流程也比較繁瑣,而且由於NFS的原因還導致分析失敗。一直想改寫,最初想用Ruby On Rails,可是一直沒有時間學習和開發(在找借口啊!)。在杭州QCon 2011上又遇到了Node.js,雖然之前也聽說過,但是沒有深入研究,聽了淘寶蘇千 的演講後,當時了就有要用Node.js實現這個日志分析系統的想法。前端用JS,服務器用JS,就連數據庫的Shell都是JS,想想就夠酷的——當然最關鍵是代碼量小。
一、用Node.js實現服務器端代碼
為了有良好的風格和快速的代碼編寫,不可避免地應該采用一個簡單的框架。Express實現了大部分的功能,可是好需要花一定時間熟悉,並且看起來對這個項目來說有些重量級。在Node.js的官網上有一個聊天的Demo ,這個代碼簡單移動,封裝了對URL的處理和返回JSON。於是我就直接使用了fu.js,重寫了server.js:
復制代碼 代碼如下:HOST = null; // localhost
PORT = 8001;
var fu = require("./fu"),
sys = require("util"),
url = require("url"),
mongo = require("./request_handler");
fu.listen(Number(process.env.PORT || PORT), HOST);
fu.get("/", fu.staticHandler("index.html"));
太簡單了吧?!不過的確是這樣,一個服務器已經建立起來了。
下面看處理請求的request_handler.js代碼:
var mongodb = require("mongodb");
var fu = require("./fu");
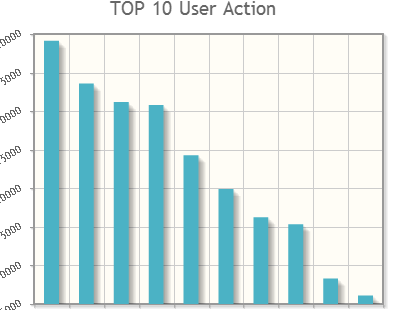
// TOP 10 user Action
fu.get("/userActionTop10", function(req, res){
mongodb.connect('mongodb://localhost:27017/log', function(err, conn){
conn.collection('action_count', function(err, coll){
coll.find({"value.action":{$in:user_action}}).sort({"value.count":-1}).limit(10).toArray(function(err, docs){
if(!err){
var action = [];
var count = [];
for(var i = 0; i < docs.length; i ++){
//console.log(docs[i]);
action.push(docs[i].value.action);
count.push(docs[i].value.count);
}
res.simpleJSON(200, {action:action, count:count});
// 一定要記得關閉數據庫連接
conn.close();
}
});
});
});
});
二、客戶端
日志系統的最重要的是可視化顯示,這裡使用了JQuery的一個插件jqPlot Chart 。首先使用一個靜態的HTML頁面,用來作為圖形顯示的容器:
代碼如下:<!DOCTYPE html>
<html>
<head>
<meta charset="utf-8">
<title>Rendezvous Monitor System</title>
<!--[if lt IE 9]><script src="js/excanvas.js"><![endif]-->
<script src="js/jquery.min.js"></script>
<script src="js/jquery.jqplot.min.js"></script>
<script src="js/plugins/jqplot.barRenderer.min.js"></script>
<script src="js/plugins/jqplot.categoryAxisRenderer.min.js"></script>
<script src="js/plugins/jqplot.canvasTextRenderer.min.js"></script>
<script src="js/plugins/jqplot.canvasAxisTickRenderer.min.js"></script>
<script src="js/plugins/jqplot.canvasAxisLabelRenderer.min.js"></script>
<script src="js/plugins/jqplot.pointLabels.min.js"></script>
<script src="js/plugins/jqplot.dateAxisRenderer.min.js"></script>
<script src="js/plugins/jqplot.json2.min.js"></script>
<link rel="stylesheet" href="js/jquery.jqplot.min.css">
<link rel="stylesheet" href="style/base.css">
<script src="js/charts.js"></script>
</head>
<body>
</body>
</html>
幾乎是jqPlot的示例中的完整拷貝,好吧,我承認我太懶了。
下面是看用來顯示生成圖形的chart.js:
// Store all chart drawing function, if we want to disable one chart, only need
// comment the push line when putting fucntion into the array.
var draws = [];
/****************************** TOP 10 User Action Start *********************************/
document.write('<div id="userActionTop10Chart"></div>');
var drawUserActionTop10Chart = function(){
if(!$("#userActionTop10Chart").attr('class')){
$("#userActionTop10Chart").attr('class', 'small_chart');
}
$.ajax({
async:false,
url: '/userActionTop10',
dataType:'json',
cache: false,
success:function(data){
try{
$('#userActionTop10Chart').html('');
$.jqplot('userActionTop10Chart', [data.count], {
title: "TOP 10 User Action",
seriesDefaults:{
renderer:$.jqplot.BarRenderer,
rendererOptions: {fillToZero: true},
pointLabels: {
show:true,
ypadding:1
}
},
axesDefaults:{
tickRenderer:$.jqplot.CanvasAxisTickRenderer,
tickOptions: {
angle: -30,
fontSize: '12px'
}
},
axes: {
xaxis: {
renderer: $.jqplot.CategoryAxisRenderer,
ticks: data.action
},
yaxis: {
pad: 1.05
}
}
});
}catch(e){
//alert(e.message);
}
}
});
}
draws.push('drawUserActionTop10Chart');
/******************************* TOP 10 User Action End ************************************/
/*********** Chart Start *****************/
//Put your chart drawing function here
//1. insert a div for the chart
//2. implement the function drawing chart
//3. push the function name into the array draws
/*********** Chart End *******************/
// Draw all charts
var drawAllCharts = function(){
for(var i = 0; i < draws.length; i ++){
eval(draws[i] + "()");
}
//Recall itself in 5 minute.
window.setTimeout(drawAllCharts, 5 * 60 * 1000);
}
//
$(function(){
drawAllCharts();
});
服務器端和客戶端的代碼都有了,那就跑起來看效果吧:
好像忘了什麼?日志的分析代碼。
三、使用MongoDB 增量式MapReduce實現日志分析
在MongoDB的文檔中有關於Incremental MapReduce的介紹。剛開始一直以為MongoDB實現Streaming處理,可以自動執行增量式的MapReduce。最後發現原來是我理解有誤,文檔裡並沒有寫這一點,只是說明了如何設置才能增量執行MapReduce。
為了方便,我把MapReduce使用MongoDB的JavaScript寫在了單獨的js文件中,然後通過crontab定時執行。stats.js的代碼:
代碼如下:/************** The file is executed per 5 minutes by /etc/crontab.*****************/
var action_count_map = function(){
emit(this.action, {action:this.action, count:1});
}
var action_count_reduce = function(key, values){
var count = 0;
values.forEach(function(value){
count += value.count;
});
return {action:key, count : count};
}
db.log.mapReduce(action_count_map, action_count_reduce, {query : {'action_count' : {$ne:1}},out: {reduce:'action_count'}});
db.log.update({'action_count':{$ne:1}}, {$set:{'action_count':1}}, false, true);
思路很簡單:
1. 在map中將每個action訪問次數設為1
2. reduce中,統計相同action的訪問次數
3. 執行mapReduce。指定了查詢為‘action_count'不等於1,也就是沒有執行過該統計;將結果存儲在‘action_count'集合,並且使用reduce選項表示該結果集作為下次reduce的輸入。
4. 在當前所有日志記錄設置'action_count'的值為1,表示已經執行過該統計。不知道這種是否會造成沒有還沒有統計過的記錄也被更新??望有經驗的大俠賜教!
定時執行stats.js的shell:
代碼如下:*/5 * * * * root cd /root/log; mongo localhost:27017/log stats.js
好了,這就是全部的代碼,沒有什麼特別玄妙的地方,不過Node.js真的是個好東西。
相關文章
- text-decoration:line-through CSS文字中劃線 刪除線 貫穿線樣式
- JS中script標簽defer和async屬性的區別詳解
- 基於Blod的ajax進度條下載實現示例代碼
- jQuery插件HighCharts實現氣泡圖效果示例【附demo源碼】
- jQuery插件HighCharts實現的2D堆條狀圖效果示例【附demo源碼下載】
- jQuery插件HighCharts繪制的2D堆柱狀圖效果示例【附demo源碼下載】
- jQuery插件HighCharts實現的2D條狀圖效果示例【附demo源碼下載】
- jQuery插件HighCharts實現的2D面積圖效果示例【附demo源碼下載】
- jQuery is not defined 錯誤原因與解決方法小結
- jQuery插件HighCharts繪制簡單2D折線圖效果示例【附demo源碼】