HTML 5 Web Sockets應用初探(4)
編輯:CSS詳解
第八步:關閉Socket
關閉Socket操作相當簡單,添加對斷開連接按鈕的click事件監聽就可以。
- $('#disconnect').click(function(){
- socket.close();
- });
完整JavaScript代碼
- $(document).ready(function() {
- if(!("Web Socket" in window)){
- $('#chatLog, input, button, #examples').fadeOut("fast");
- $('<p>Oh no, you need a browser that supports Web Sockets. How about <a href="http://www.google.com/Chrome">Google Chrome</a>?</p>').appendTo('#container');
- }else{
- //The user has Web Sockets
- connect();
- function connect(){
- var socket;
- var host = "ws://localhost:8000/socket/server/startDaemon.PHP";
- try{
- var socket = new Web Socket(host);
- message('<p class="event">Socket Status: '+socket.readyState);
- socket.onopen = function(){
- message('<p class="event">Socket Status: '+socket.readyState+' (open)');
- }
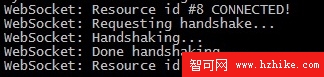
- socket.onmessage = function(msg){
- message('<p class="message">Received: '+msg.data);
- }
- socket.onclose = function(){
- message('<p class="event">Socket Status: '+socket.readyState+' (Closed)');
- }
- } catch(exception){
- message('<p>Error'+exception);
- }
- function send(){
- var text = $('#text').val();
- if(text==""){
- message('<p class="warning">Please enter a message');
- return ;
- }
- try{
- socket.send(text);
- message('<p class="event">Sent: '+text)
- } catch(exception){
- message('<p class="warning">');
- }
- $('#text').val("");
- }
- function message(msg){
- $('#chatLog').append(msg+'</p>');
- }
- $('#text').keypress(function(event) {
- if (event.keyCode == '13') {
- send();
- }
- });
- $('#disconnect').click(function(){
- socket.close();
- });
- }//End connect
- }//End else
- });
第九步:運行Web Socket服務器
我們要輸入一些命令行,XAMPP提供了比較方便的shell選項。點擊XAMPP控制面板的’shell’按鈕並輸入:
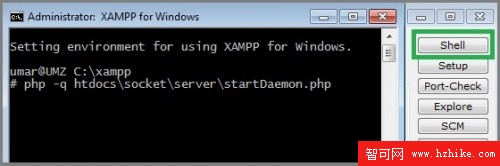
- php -q path\to\server.PHP
現在你已經運行了Web Socket服務器!
大功告成!
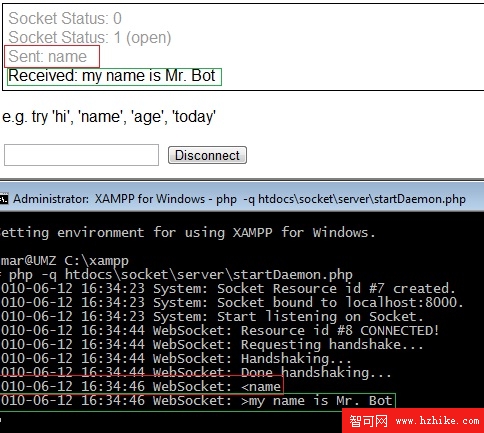
當頁面讀取後,將嘗試創建一個Web Socket連接,然後用戶可以輸入信息並從服務器接收信息。大家可以通過The Web Socket API了解Html 5 Web Socket的最新動態。
原文標題:Html 5 Web Sockets 基礎使用教程
原文地址:http://blog.bingo929.com/Html5-Web Sockets.Html
小編推薦
熱門推薦