The goal of this tutorial is to create a Java Application project and then add a sample XML schema to that project. You can add XML schema files to any project type in the IDE, except UML projects.
Tutorial Requirements
Before you proceed, make sure you revIEw the requirements in this section.
Prerequisites
The XML schema tools tutorials assume that you have some knowledge of, and experIEnce with XML (Extensible Markup Language).
Software Needed for This Tutorial
Before you begin, you need to install the following software on your computer:
NetBeans 6.0. Select the Download All option. The Download All option includes SOA Pack and GlassFish V2, which are required for this tutorial.
Some XML schema tools tutorials use the UBL sample schema that is included in the Java Web Services Developer Pack (Java WSDP) Version 2.0.
If you want to step through these tutorials offline, you should download Java WSDP.
Creating a Java Application Project
In this tutorial, you will use a Java Application project called mySchemaPrj as a container for the XML schema.
To create a new mySchemaPrj project:
In the IDE, choose File > New Project.
In the CategorIEs list, select the Java node.
In the Projects list, select JavaApplication and click Next.
In the Name and Location page, in the Project Name fIEld, enter mySchemaPrj and specify the project location.
Clear the Create Main Class checkbox and click Finish.
We do not need a main class for this tutorial.
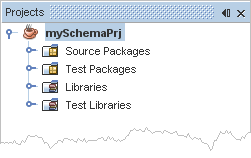
The Projects window now contains a project node labeled mySchemaPrj.
Opening a Sample XML Schema
Now that you have created the mySchemaPrj project, you will add a sample XML schema to the project.
To add a sample XML schema to the mySchemaPrj project:
In the Projects window, if the mySchemaPrj project node is not expanded, expand it now.
Select the SourcePackages node, right-click and choose New > Other.
The New File wizard opens. The Project drop-down list contains the name of the project where you are adding the file, in this case, mySchemaPrj.
In the CategorIEs list, expand the XML node.
In the File Types list, select Loan Application Schema and click Next.
Accept the default values in the Name and Location page of the wizard (File Name: newLoanApplication, Folder: src) and click Finish.
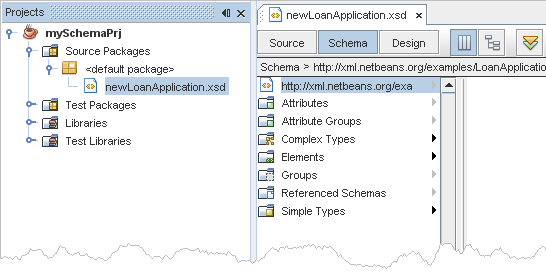
In the Projects window, the <defaultpackage> node under the SourcePackages node now contains a subnode labeled newLoanApplication.xsd. The Source Editor contains a tab for the XML schema file, newLoanApplication.xsd.