一、利用jquery.form插件提交表單方法使用jquery.validate插件
現象:當提交表單時,即使前台未驗證通過,也照常提交表單。
解決辦法:
代碼 代碼如下:
$('#myForm').submit(function(){
if (!$(this).valid()) return false;//加上此句OK
$('.error').html('');
$("#go").prop("disabled",true);
$(this).ajaxSubmit({
type:"POST",
//beforeSubmit: showRequest,
dataType:'json',
success: showResponse
});
return false;
});
相關說明:
定制提交方式(ajax提交)
如果使用ajax方式提交,那請采用如下兩種方式和校驗框架結合
1)、使用submitHandler屬性配置ajax提交,submithandler:當表單全部校驗通過之後會回調配置的代碼,此處也就是當校驗通過之後調用ajax提交。
2)、使用valid方法,監聽form的submit事件,當$('#form').valid()返回true的時候再提交。
通過監聽form的submit事件,對form進行ajax提交。示例完整代碼如下:
代碼 代碼如下:
$(document).ready(function(){
$('#myForm').submit(function(){
if (!$(this).valid()) return false;
$('.error').html('');
$("#go").prop("disabled",true);
$(this).ajaxSubmit({
type:"POST",
//beforeSubmit: showRequest,
dataType:'json',
success: showResponse
});
return false;
});
var validator = $("#myForm").validate({
rules: {
username: "required",
email: {
required: true,
email: true
}
},
messages: {
username: "請輸入姓名",
email: {
required: "請輸入Email地址",
email: "請輸入正確的email地址"
}
}
});
});
function showResponse(jsonData,statusText)
{
if(statusText=='success')
{
$("#go").prop("disabled",false);
if (jsonData.status == 1)
{
$("#return").html(jsonData.message);
}
else
{
$.each(jsonData.errors, function(k,v){
//$('#output').find('ul').append('<li>' + v + '</li>');
$('.e_' + k).html(v);
});
}
}
}
二、控制錯誤信息位置的方法
現象一:
我在注冊表單新加了一個驗證碼。驗證結果錯誤時,這個錯誤信息跑到驗證碼前面去了。如下圖所示:
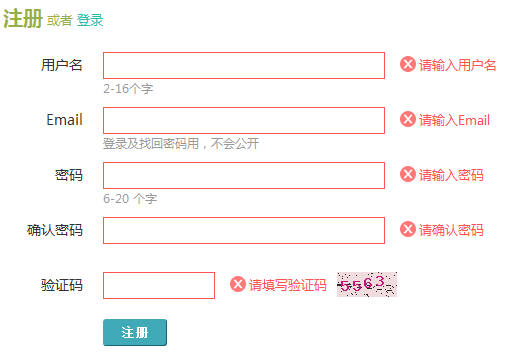
目的:讓錯誤信息在驗證碼後面
現象二:
上圖中的紅色提示內容,我想移到 (* 必填) 的後面。
上面兩個現象,可通過jquery.validate自帶的控制錯誤信息位置的方法——'errorPlacement',使用也很方便:
代碼 代碼如下:
errorPlacement: function(error, element)
{
error.appendTo(element.parent());
}