JS基於ocanvas插件實現的簡單畫板效果代碼(附demo源碼下載)
編輯:關於JavaScript
本文實例講述了JS基於ocanvas插件實現的簡單畫板效果。分享給大家供大家參考,具體如下:
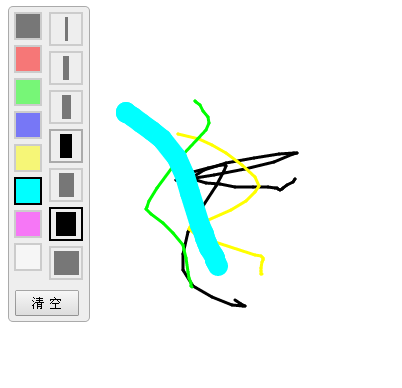
使用ocanvas做了個簡單的在線畫板。
ocanvas參考:http://ocanvas.org/
效果如下:
主要代碼如下:
<!DOCTYPE html>
<html>
<head>
  <meta charset="UTF-8" />
  <title>oCanvas Example</title>
  <meta name="robots" content="noindex, nofollow">
  <meta name="viewport" content="width=device-width, initial-scale=1.0, maximum-scale=1.0, user-scalable=no" />
  <meta name="apple-mobile-web-app-capable" content="yes" />
  <meta name="apple-mobile-web-app-status-bar-style" content="black" />
  <script src="http://libs.useso.com/js/zepto/1.1.3/zepto.min.js"></script>
  <script>
  var line_color = '#000';
  var line_size = 3;
  $(function(){
    $('.tool .color div').click(function(){
      $('.tool .color div').removeClass('active');
      $(this).addClass('active');
      line_color = $(this).data('color');
      mouseDot.fill = line_color;
    });
    $('.tool .size div').click(function(){
      $('.tool .size div').removeClass('active');
      $(this).addClass('active');
      line_size = $(this).data('size');
      mouseDot.radius = Math.max(line_size / 2, 3);
    });
  });
  </script>
  <style>
  body, html {padding:0; margin:0; overflow:hidden;}
  .tool{position:absolute; top:10px; left:10px; border:solid 1px #aaa; background-color:#eee; border-radius:5px; padding-right:5px;}
  .tool .color {float:left; margin:5px; width:30px;}
  .tool .color div{width:24px; height:24px; border:solid 2px #aaa; margin-bottom:5px; opacity:0.5;}
  .tool .color div:hover{opacity:1; cursor:pointer;}
  .tool .color .active{opacity:1; border:solid 2px #000;}
  .tool .size {float:left; margin:5px; width:30px; margin-left:0;}
  .tool .size div{width:30px; height:30px; border:solid 2px #aaa; margin-bottom:5px; opacity:0.5;}
  .tool .size div:hover{opacity:1; cursor:pointer;}
  .tool .size .active{opacity:1; border:solid 2px #000;}
  .tool .size span{display:block; margin:3px auto; height:24px; background-color:black;}
  .btn {clear:both; margin-bottom:5px; text-align:center;}
  .btn input {padding:3px 15px;}
  </style>
</head>
<body>
  <canvas id="canvas" width="200" height="100"></canvas>
  <div class="tool">
    <div class="color">
      <div style="background:#000;" data-color="#000" class="active"></div>
      <div style="background:#f00;" data-color="#f00"></div>
      <div style="background:#0f0;" data-color="#0f0"></div>
      <div style="background:#00f;" data-color="#00f"></div>
      <div style="background:#ff0;" data-color="#ff0"></div>
      <div style="background:#0ff;" data-color="#0ff"></div>
      <div style="background:#f0f;" data-color="#f0f"></div>
      <div style="background:#fff;" data-color="#fff"></div>
    </div>
    <div class="size">
      <div class="active" data-size="3" ><span style="width:3px;" ></span></div>
      <div data-size="6" ><span style="width:6px;" ></span></div>
      <div data-size="9" ><span style="width:9px;" ></span></div>
      <div data-size="12"><span style="width:12px;"></span></div>
      <div data-size="15"><span style="width:15px;"></span></div>
      <div data-size="20"><span style="width:20px;"></span></div>
      <div data-size="25"><span style="width:25px;"></span></div>
    </div>
    <div class="btn">
      <input type="button" value="清 空" onclick="clearAll();" />
    </div>
  </div>
  <script src="js/ocanvas-2.7.3.min.js"></script>
  <script>
  var c = document.querySelector("#canvas"),
  ctx = c.getContext("2d");
  c.width = window.innerWidth;
  c.height = window.innerHeight;
  c.addEventListener("touchmove", function (e) { e.preventDefault(); }, false);
  var cs = oCanvas.create({
    canvas: "#canvas",
    background: "#fff",
    fps: 30,
    disableScrolling: true
  });
  var isDraw = false;
  var xx = 0;
  var yy = 0;
  var mouseDot;
  clearAll();
  cs.bind('mousedown', function(){
    drawBegin(cs.mouse.x, cs.mouse.y);
  }).bind('touchstart tap', function(){
    drawBegin(cs.touch.x, cs.touch.y);
  }).bind('mouseup touchend', function(){
    isDraw = false;
  }).bind('mousemove', function(){
    drawMove(cs.mouse.x, cs.mouse.y);
  }).bind('touchmove', function(){
    drawMove(cs.touch.x, cs.touch.y);
  });
  /*
  cs.setLoop(function () {
    mouseDot.x = cs.mouse.x;
    mouseDot.y = cs.mouse.y;
  }).start();
  */
  function drawBegin(x, y)
  {
    isDraw = true;
    xx = x;
    yy = y;
    var dot = cs.display.arc({
      x: x,
      y: y,
      radius: line_size / 2,
      start: 0,
      end: 360,
      fill: line_color
    });
    cs.addChild(dot);
  }
  function drawMove(x, y)
  {
    if (isDraw)
    {
      var line = cs.display.line({
        start: { x: xx, y: yy },
        end: { x: x, y: y },
        stroke: '' + line_size + 'px ' + line_color,
        cap: "round"
      });
      cs.addChild(line);
      xx = x;
      yy = y;
    }
    else
    {
      mouseDot.moveTo(x, y);
      cs.addChild(mouseDot);
      cs.draw.redraw();
    }
  }
  function clearAll()
  {
    cs.reset();
    // 處理鼠標
    cs.mouse.hide();
    mouseDot = cs.display.arc({
      x: -100,
      y: -100,
      radius: Math.max(line_size / 2, 3),
      start: 0,
      end: 360,
      fill: line_color,
      shadow: '0 0 5px #333'
    });
    cs.addChild(mouseDot);
  }
  </script>
</body>
</html>
更多關於JavaScript相關內容感興趣的讀者可查看本站專題:《JavaScript切換特效與技巧總結》、《JavaScript查找算法技巧總結》、《JavaScript動畫特效與技巧匯總》、《JavaScript錯誤與調試技巧總結》、《JavaScript數據結構與算法技巧總結》、《JavaScript遍歷算法與技巧總結》及《JavaScript數學運算用法總結》
完整實例代碼點擊此處本站下載。
希望本文所述對大家JavaScript程序設計有所幫助。
小編推薦
熱門推薦