本篇文章主要介紹如何實現Web頁面內容的打印預覽和保存操作的相關知識,一起學習吧!
1、Web頁面打印的問題
在此之前,我一般使用比較好用的LODOP來執行打印的操作,這個在我之前有很多文章都有涉及,這個控件是一個ActiveX的控件,需要下載安裝後就可以在頁面是進行打印的排版設計,預覽,打印等操作,還是很方便的一個控件,因此都很適合普通內容的打印,證件的套打等操作。
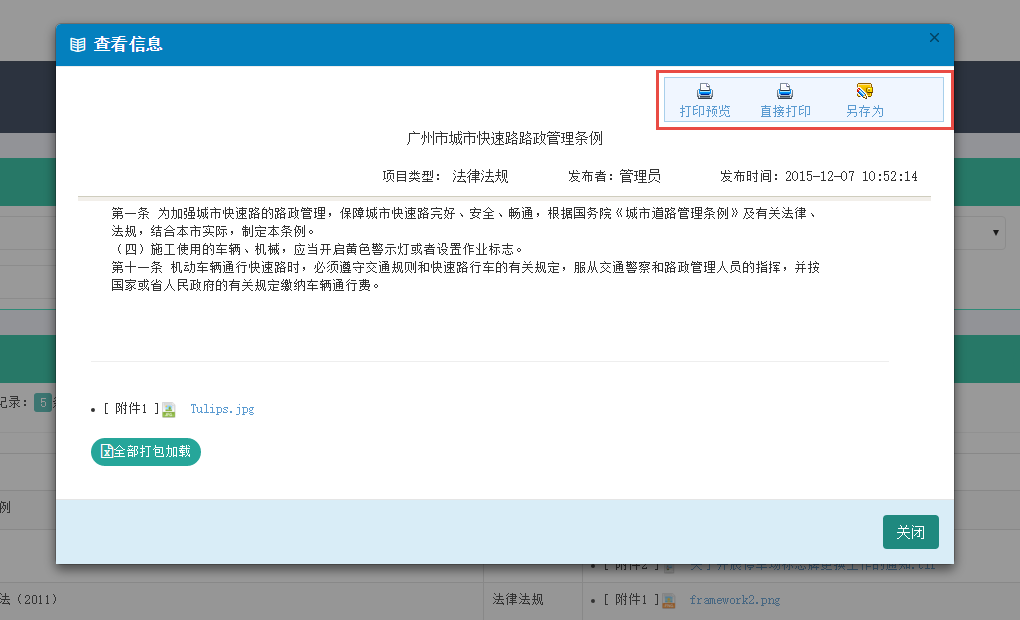
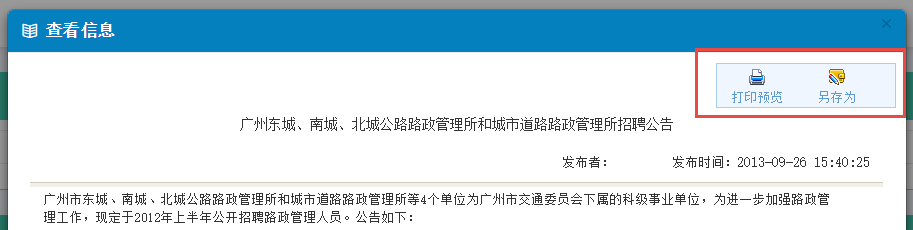
不過隨著浏覽器技術的更新,這個插件在Chrome或者FireFox上好像不受支持了,基本上摒棄了這種插件的處理方式了。例如如果我在頁面上需要打印對話框裡面的內容,如下所示。
如果按正常使用LODOP的方式來進行處理的話,那麼會得到Chrome浏覽器的提示,並且這個不管你重新下載安裝、更新LODOP控件,都會繼續這個錯誤提示的。

對於替代方式,這裡就是本篇內容介紹的主題了,我一直喜歡尋找一些比較好的方式的方式來實現自己需要的功能,於是找到了PrintThis的這個插件(https://github.com/jasonday/printThis)以及jquery-print-preview-plugin(https://github.com/etimbo/jquery-print-preview-plugin),對比兩者我比較喜歡第一個的簡潔方便的使用。
2、PrintThis打印插件的使用
有了上面的問題,我們引入一個新的打印方式,也就是JQuery插件來實現我們所需要頁面內容的打印操作。
這個插件的使用非常簡潔方便,首先需要在頁面裡面引入對應的JS文件,如下所示。
<script src="~/Content/JQueryTools/printThis/printThis.js"></script>
我們再在頁面頂部增加兩個按鈕,如打印和導出操作,代碼如下所示
<div class="toolbar">
 <a href="#" onclick="javascript:Preview();"><img alt="打印預覽" src="~/Content/images/print.gif" /><br />打印預覽</a>
 <a href="#" onclick="javascript:SaveAs();"><img alt="另存為" src="~/Content/images/saveas.gif" /><br />另存為</a>
</div>
然後我們還需要聲明一個DIV用來放置顯示的Web頁面內容,這樣也方便對它調用進行打印操作。
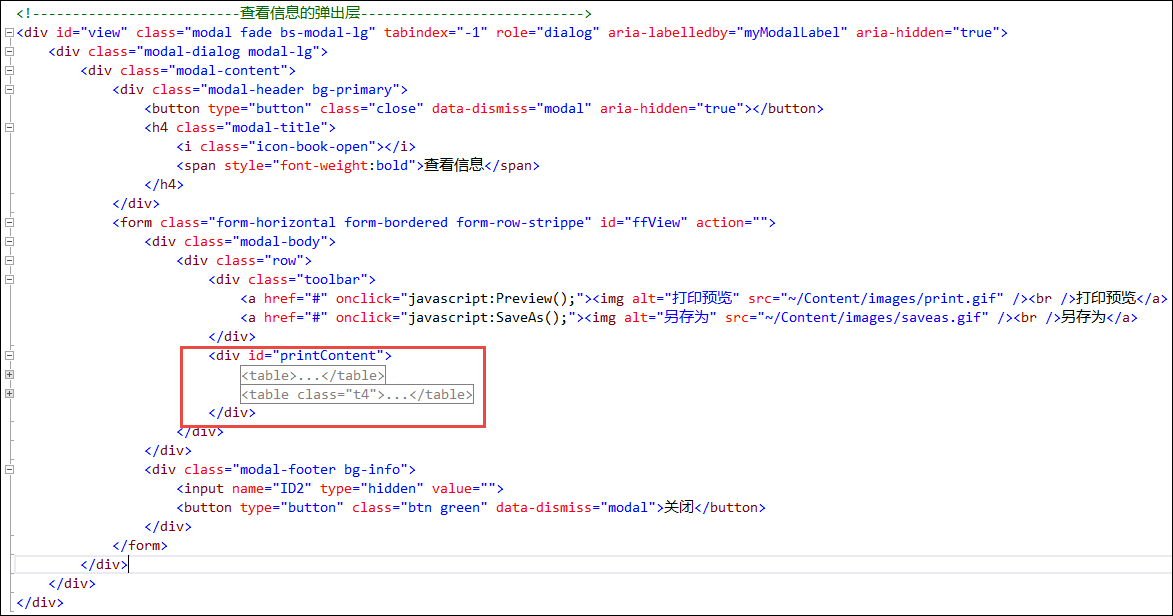
我們打印的處理代碼也很簡單,就是直接對層進行打印處理就可以了,可以看到下面的使用代碼非常簡單。
//打印預覽
    function Preview() {
      $("#printContent").printThis({
        debug: false,
        importCSS: true,
        importStyle: true,
        printContainer: true,
        loadCSS: "/Content/Themes/Default/style.css",
        pageTitle: "通知公告",
        removeInline: false,
        printDelay: 333,
        header: null,
        formValues: true
      });
    };
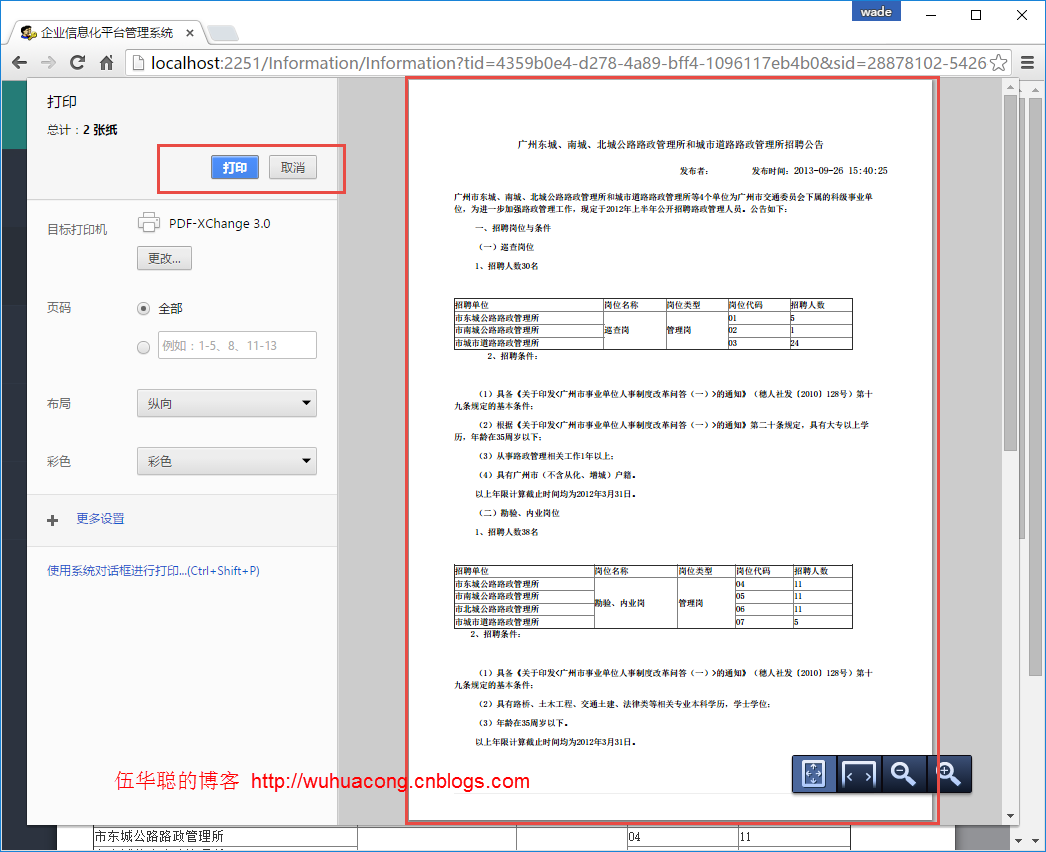
打印執行後,IE和Chrome都會彈出一個打印預覽對話框,確認是否進行打印的操作。
3、頁面內容的保存操作
有時候,為了方便業務處理,我們一般也可以提供給用戶一個導出打印內容的操作,如下所示代碼就是把打印的內容導出到Word裡面給用戶加工等用途。
 function SaveAs() {
      var id = $('#ID2').val();
      window.open('/Information/ExportWordById?id=' + id );
    }
上面的操作,主要就是調用了MVC的控制器方法進行處理,傳入一個id就可以把內容提取出來,然後把它生成所需的Word內容即可。
這裡後台我們主要利用Apose.Word控件來進行模板化的文檔生成。
其中我們可以在書簽裡面定義或者查看一些書簽的信息,如下圖所示。
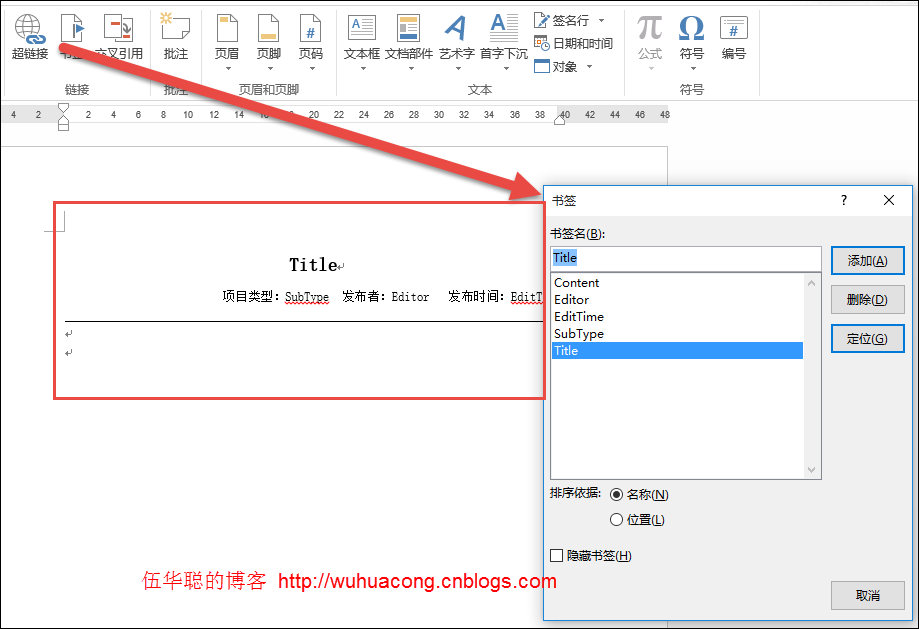
這樣我們在代碼裡面,就可以獲取信息並指定這個Word模板了。
 InformationInfo info = BLLFactory<Information>.Instance.FindByID(id);
      if (info != null)
      {
        string template = "~/Content/Template/政策法規模板.doc";
        string templateFile = Server.MapPath(template);
        Aspose.Words.Document doc = new Aspose.Words.Document(templateFile);
WORD模板的內容,可以使用文本替換方式,如下所示。
SetBookmark(ref doc, "Content", info.Content);
也可以使用書簽BookMark方式查詢替換,如下代碼所示。
 Aspose.Words.Bookmark bookmark = doc.Range.Bookmarks[title];
      if (bookmark != null)
      {
        bookmark.Text = value;
      }
對於主體的HTML內容,這需要特殊對待,一般需要使用插入HTML的專用方式進行寫入內容,否則就顯示HTML代碼了,使用專用HTML方法寫入的內容,和我們在網頁上看到的基本沒有什麼差異了。如下代碼所示。
DocumentBuilder builder = new DocumentBuilder(doc);
        Aspose.Words.Bookmark bookmark = doc.Range.Bookmarks["Content"];
        if (bookmark != null)
        {
          builder.MoveToBookmark(bookmark.Name);
          builder.InsertHtml(info.Content);
        }
整個導入WORD文檔的方法就是利用這些內容的整合,實現一個標准文檔的生成,這種業務文檔是固定模板的,因此很適合在實際業務中使用,比起使用其他方式自動生成的HTML文件或者文檔,有更好的可塑性和美觀性。
整個代碼如下所示。
 public FileStreamResult ExportWordById(string id)
    {
      if (string.IsNullOrEmpty(id)) return null;
      InformationInfo info = BLLFactory<Information>.Instance.FindByID(id);
      if (info != null)
      {
        string template = "~/Content/Template/政策法規模板.doc";
        string templateFile = Server.MapPath(template);
        Aspose.Words.Document doc = new Aspose.Words.Document(templateFile);
        #region 使用文本方式替換
        //Dictionary<string, string> dictSource = new Dictionary<string, string>();
        //dictSource.Add("Title", info.Title);
        //dictSource.Add("Content", info.Content);
        //dictSource.Add("Editor", info.Editor);
        //dictSource.Add("EditTime", info.EditTime.ToString());
        //dictSource.Add("SubType", info.SubType);
        //foreach (string name in dictSource.Keys)
        //{
        //  doc.Range.Replace(name, dictSource[name], true, true);
        //}
        #endregion
        //使用書簽方式替換
        SetBookmark(ref doc, "Title", info.Title);
        SetBookmark(ref doc, "Editor", info.Editor);
        SetBookmark(ref doc, "EditTime", info.EditTime.ToString());
        SetBookmark(ref doc, "SubType", info.SubType);
        //SetBookmark(ref doc, "Content", info.Content);
        //對於HTML內容,需要通過InsertHtml方式進行寫入
        DocumentBuilder builder = new DocumentBuilder(doc);
        Aspose.Words.Bookmark bookmark = doc.Range.Bookmarks["Content"];
        if (bookmark != null)
        {
          builder.MoveToBookmark(bookmark.Name);
          builder.InsertHtml(info.Content);
        }
        doc.Save(System.Web.HttpContext.Current.Response, info.Title, Aspose.Words.ContentDisposition.Attachment,
          Aspose.Words.Saving.SaveOptions.CreateSaveOptions(Aspose.Words.SaveFormat.Doc));
        HttpResponseBase response = ControllerContext.HttpContext.Response;
        response.Flush();
        response.End();
        return new FileStreamResult(Response.OutputStream, "application/ms-word");
      }
      return null;
    }
    private void SetBookmark(ref Aspose.Words.Document doc, string title, string value)
    {
      Aspose.Words.Bookmark bookmark = doc.Range.Bookmarks[title];
      if (bookmark != null)
      {
        bookmark.Text = value;
      }
    }
最後導出的WORD文檔就是模板化的具體文檔內容了,WORD預覽界面如下所示。
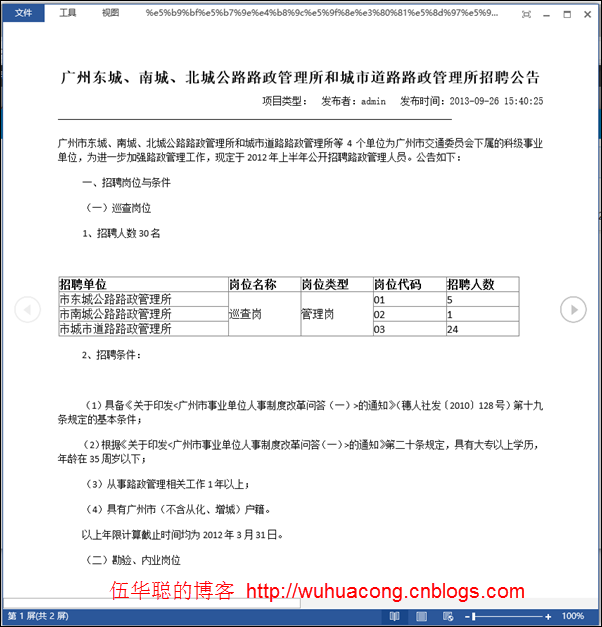
以上所述是小編給大家介紹的基於BootStrap Metronic開發框架經驗小結【九】實現Web頁面內容的打印預覽和保存操作 的相關內容,希望對大家有所幫助,如果大家想了解更多資訊敬請關注網站!