javascript實現淘寶幻燈片廣告展示效果
編輯:JavaScript綜合知識
本文實例講述了javascript實現淘寶幻燈片廣告展示效果的方法。分享給大家供大家參考。具體如下:
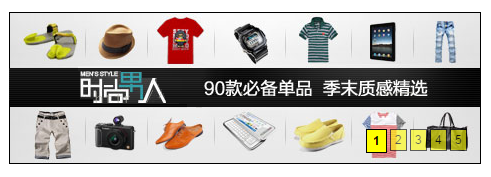
一、效果圖如下:
二、代碼部分:
JS代碼部分:
?
1 2 3 4 5 6 7 8 9 10 11 12 13 14 15 16 17 18 19 20 21 22 23 24 25 26 27 28 29 30 31 32 33 34 35 36 37 38 39 40 41 42 43 44 45 46 47 function getClass(oParent,name){ var arr=[]; var oBj=oParent.getElementsByTagName("*"); for(var i=0;i<oBj.length;i++){ if(oBj[i].className==name){ arr.push(oBj[i]); } } return arr; } function startmove(obj,json,fnEnd){ var cur=0; clearInterval(obj.timer); obj.timer=setInterval(function(){ var oStop=true; for(var attr in json){ if(attr=='opacity'){ cur=Math.round(parseFloat(getStyle(obj,attr)*100)); }else{ cur=parseInt(getStyle(obj,attr)); } var speed=(json[attr]-cur)/10; speed=speed>0?Math.ceil(speed):Math.floor(speed); if(cur!=json[attr]){ oStop=false; } if(attr=='opacity'){ obj.style[attr]=(cur+speed)/100; obj.style.filter="alpha(opacity:"+cur+speed+")"; }else{ obj.style[attr]=cur+speed+"px"; } } if(oStop){ clearInterval(obj.timer); if(fnEnd)fnEnd(); } },30); }; function getStyle(obj,name){ if(obj.currentStyle){ return obj.currentStyle[name]; }else{ return getComputedStyle(obj,false)[name]; } };CSS部分:
?
1 2 3 4 5 6 7 8 9 10 11 12 13 14 15 16 17 18 19 20 21 22 23 24 25 26 27 28 29 *{ margin: 0px; padding: 0px; } img{ border: none; width: 470px; height: 150px; float: left; } .pic_body li{ width: 470px; height: 150px; float: left; z-index: 3001; } ul{ list-style: none; position: absolute; top: 0px; left: 0px; width: 470px; height: 150px; background: yellow; z-index: 3000; } #div1{ border: 1px solid black; width: 470px; height: 150px; position: relative; margin: 100px auto; padding: 0px; overflow: hidden; } #div1 ol{ bottom: 10px; right: 10px; position: absolute; z-index: 9999; } ol li{ background: yellow; float: left; display: inline; margin-right: 3px; padding: 3px 4px; position: relative; top: 0px; left: 0px; font-family: arial; font-size: 12px; cursor: pointer; filter: alpha(opacity:60); opacity: 0.6; border: 1px solid black; } .active{ background: yellow; font-weight: bolder; padding: 4px 6px; filter: alpha(opacity:100); opacity: 1; }HTML部分:
?
1 2 3 4 5 6 7 8 9 10 11 12 13 14 15 16 17 18 19 20 21 22 23 24 25 26 27 28 29 30 31 32 33 34 35 36 37 38 39 40 41 42 43 44 45 46 47 48 49 50 51 52 53 54 55 56 57 58 59 60 61 62 63 64 <!DOCTYPE html> <html> <head lang="en"> <meta charset="UTF-8"> <title></title> <link href="css.css" rel="stylesheet" type="text/css"> <script src="myscript.js"></script> <script> window.onload=function() { var now = 0; var oDiv = document.getElementById('div1'); var oOl = oDiv.getElementsByTagName('ol')[0]; var oLi = oOl.getElementsByTagName('li'); var oUl = getClass(oDiv, 'pic_body')[0]; for(var i=0;i<oLi.length;i++){ oLi[i].index=i; oLi[i].onclick=function(){ now=this.index; tab(); }; } function tab(){ for(var i=0;i<oLi.length;i++){ oLi[i].className=''; } oLi[now].className='active'; startmove(oUl,{top:-150*now}); }; function next(){ now++; if(now==oLi.length){ now=0; } tab(); }; var timer=setInterval(next,3000); oUl.onmouseover=function(){ clearInterval(timer); }; oUl.onmouseout=function(){ timer=setInterval(next,3000); }; } </script> </head> <body> <div id="div1"> <ol> <li class="active">1</li> <li>2</li> <li>3</li> <li>4</li> <li>5</li> </ol> <ul class="pic_body"> <li><img src="image/1.jpg"></li> <li><img src="image/2.jpg"></li> <li><img src="image/3.jpg"></li> <li><img src="image/4.jpg"></li> <li><img src="image/5.jpg"></li> </ul> </div> </body> </html>希望本文所述對大家的javascript程序設計有所幫助。
小編推薦
熱門推薦