這篇文章主要介紹了在Mac OS下使用Node.js的簡單教程,Node.js是讓JavaScript應用運行於服務器端的框架,需要的朋友可以參考下
這裡有一篇很好的 Node.js 介紹文章 great nodejs intro ,它將給你一個非常方便的介紹 Node.js 和 CouchDB,並給出一個實例實現 REST 的服務用於執行書簽的 CRUD 操作,使用 CouchDB 作為數據庫。
本文將介紹在 Mac OS X 下安裝並開始使用 Node.js ,這個過程大概需要 30 分鐘左右的時間,其中我們還將安裝 CouchDB,並實現基於 CouchDB 的 REST API。
本文假設你機器上已經裝有Git,如果還沒有,請參考此文進行安裝。
安裝 node.js 和 npm
最簡單的方法是在 node.js 的官網上通過 the nodejs download section 頁面並選擇 Mac 下的安裝程序,它將在你的機器上安裝 Node.js 和 npm (node package manager).
安裝成功後你就可以使用 node 和 npm 命令了。
安裝 CouchDB
因為本文需要使用 CouchDB 來存儲對象,因此還需要安裝 CouchDB.
安裝 CouchDB 稍微麻煩一些,因為我們需要下載源碼然後編譯I,在此之前需要先安裝 Homebrew ,請執行以下命令:
?
1 2 3 4 git clone https://github.com/mxcl/homebrew.git cd homebrew/bin brew install autoconf automake libtool brew install couchdb重要的提示:CouchDB 之前報出一個問題可能會阻止你安裝,要修復這個問題需要手工編輯 ~/couch/homebrew/Library/Formula/couchdb.rb 文件,編輯內容如下:
復制代碼 代碼如下:
require 'formula'
class Couchdb < Formula
url 'http://www.apache.org/dyn/closer.cgi?path=couchdb/source/1.1.1/apache-couchdb-1.1.1.tar.gz'
homepage "http://couchdb.apache.org/"
md5 'cd126219b9cb69a4c521abd6960807a6'
請注意需要將 url 中的 source 刪除,最終修改結果如下:
代碼如下:
require 'formula'
class Couchdb < Formula
url 'http://www.apache.org/dyn/closer.cgi?path=couchdb/1.1.1/apache-couchdb-1.1.1.tar.gz'
homepage "http://couchdb.apache.org/"
md5 'cd126219b9cb69a4c521abd6960807a6'
如果安裝過程被掛起了,你需要 CTRL-C 終止並執行下面命令重試:
代碼如下:
./brew install -v couchdb
更多關於 Mac OS X 上安裝 CouchDB 的信息請閱讀 "Installing CouchDB on OSX".
一旦 CouchDB 編譯完成,我們可以手工執行 ./couchdb 來啟動它,你可以在浏覽器中打開 http://127.0.0.1:5984/_utils 這個地址以驗證 CouchDB 安裝是否成功。
下載教程
現在所需的軟件都已經安裝完成,我們接下來繼續 Node.js 的介紹實例。
首先我們使用 Git 來獲取實例源碼
git clone https://github.com/indexzero/nodejs-intro.git
創建 CouchDB 數據庫
在開始教程之前我們需要創建一個 CouchDB 數據庫,先確保 CouchDB 已經啟動,然後使用如下命令創建數據庫:
$ curl -X PUT http://127.0.0.1:5984/pinpoint-dev10
{"ok":true}
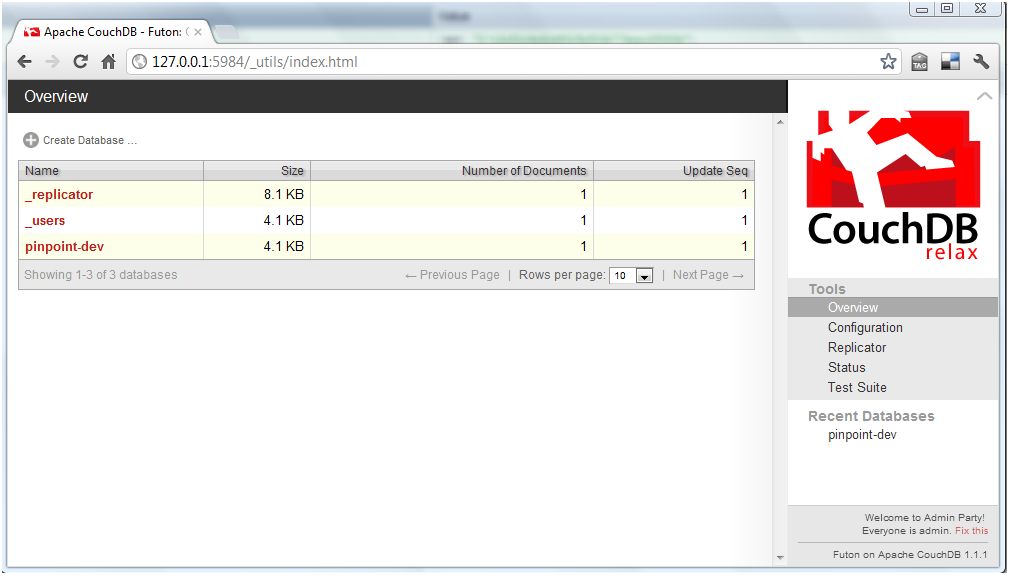
你可以在浏覽器中訪問 http://127.0.0.1:5984/_utils 就可以看到新創建的數據庫。
這裡還有一個非常棒的 CouchDB 的指南。
開始教程
node js 實例使用模塊化的方式構建,lib 目錄包含很多模塊,而服務器腳本在 bin 目錄下。
例如,我們要啟動 CouchDB 教程,可以在 bin 目錄下執行下面命令:
./server -t 02couchdb -s
其中 -t 參數允許你指定要執行的 lib 目錄下的模塊,-s 參數用以設置我們剛建立的 pinpoint-dev 數據庫。
sys - util 變化
根據 Node.js 的版本不同,你可能會看到如下的錯誤或者是警告:
代碼如下:
$ node -v
v0.7.7-pre
$ ./server -t 02couchdb -s
node.js:247
throw e; // process.nextTick error, or 'error' event on first tick
^
Error: The "sys" module is now called "util".
at sys.js:1:69
at NativeModule.compile (node.js:572:5)
at Function.require (node.js:540:18)
at Function._load (module.js:297:25)
at Module.require (module.js:357:17)
at require (module.js:373:17)
at Object. (/home/ubuntu/nodejs-intro/bin/server:3:11)
at Module._compile (module.js:444:26)
at Object..js (module.js:462:10)
at Module.load (module.js:351:32)
為了避免這個問題,你需要將所有調用 `require("sys")` 替換成 `require("util")`
Node v0.6.14 不會拋出錯誤信息,但會提示警告:
代碼如下:
$ node -v
v0.6.14
$ ./server -t 02couchdb -s
The "sys" module is now called "util". It should have a similar interface.
Pinpoint demo server listening for 02couchdb on http://127.0.0.1:8000
運行教程
當你運行某個教程時,會提示一些錯誤:
代碼如下:
$ ./server 02couchdb
The "sys" module is now called "util". It should have a similar interface.
node.js:201
throw e; // process.nextTick error, or 'error' event on first tick
^
Error: Cannot find module 'optimist'
at Function._resolveFilename (module.js:332:11)
at Function._load (module.js:279:25)
at Module.require (module.js:354:17)
at require (module.js:370:17)
at Object. (/Users/ddewaele/Projects/Node/nodejs-intro/bin/server:5:12)
at Module._compile (module.js:441:26)
at Object..js (module.js:459:10)
at Module.load (module.js:348:31)
at Function._load (module.js:308:12)
at Array.0 (module.js:479:10)
該教程包含很多依賴,我們需要使用 npm 來下載這些依賴的包。
安裝 node 包
Node packages (dependencies) 可通過 npm 命令來安裝,例如:
?
1 2 3 4 5 6 7 8 9 10 11 $ npm install optimist npm http GET https://registry.npmjs.org/optimist npm http 200 https://registry.npmjs.org/optimist npm http GET https://registry.npmjs.org/optimist/-/optimist-0.2.8.tgz npm http 200 https://registry.npmjs.org/optimist/-/optimist-0.2.8.tgz npm http GET https://registry.npmjs.org/wordwrap npm http 200 https://registry.npmjs.org/wordwrap npm http GET https://registry.npmjs.org/wordwrap/-/wordwrap-0.0.2.tgz npm http 200 https://registry.npmjs.org/wordwrap/-/wordwrap-0.0.2.tgz optimist@0.2.8 ../node_modules/optimist └── wordwrap@0.0.2這些包將被安裝到 node_modules 文件夾中:
?
1 2 3 $ ls -l ../node_modules/ total 0 drwxr-xr-x 10 ddewaele staff 340 Apr 1 18:54 optimist本文需要安裝如下的 node 包:
?
1 2 3 4 npm install winston npm install cradle npm install journey npm install optimist運行教程
進入 bin 目錄,通過下面命令來運行教程:
?
1 2 3 $ ./server -t 02couchdb -s The "sys" module is now called "util". It should have a similar interface. Pinpoint demo server listening for 02couchdb on http://127.0.0.1:8000然後打開浏覽器訪問 http://127.0.0.1:8000/bookmarks ,將會看到如下的結果:
復制代碼 代碼如下:
{"bookmarks":[]}
這表示服務已經啟動並運行,為了在 CouchDB 中添加點測試數據,我們可以使用 http-console 控制台來訪問 CouchDB 的 REST 服務。
安裝 http-console
有一個非常棒的工具可以幫助你調試服務,該工具名為 http-console ,你可使用 npm 來安裝:
?
1 sudo npm install -g http-console然後就可以在命令行中執行該工具,不幸的是當我們執行該命令時報錯了:
?
1 2 3 4 5 6 7 8 9 10 11 12 13 14 15 $ http-console node.js:201 throw e; // process.nextTick error, or 'error' event on first tick ^ Error: require.paths is removed. Use node_modules folders, or the NODE_PATH environment variable instead. at Function. (module.js:378:11) at Object. (/usr/local/lib/node_modules/http-console/bin/http-console:6:8) at Module._compile (module.js:441:26) at Object..js (module.js:459:10) at Module.load (module.js:348:31) at Function._load (module.js:308:12) at Array.0 (module.js:479:10) at EventEmitter._tickCallback (node.js:192:40)很麻煩,我們還需要手工編輯 /usr/local/lib/node_modules/http-console/bin/http-console 文件,然後刪除下面這一行:
復制代碼 代碼如下:
require.paths.unshift(path.join(__dirname, '..', 'lib'));
現在 http-console 就可以啟動了,無需任何參數,它將連接到 http://localhost:8080 ,如果你需要指定服務器和端口,把它作為第一個參數傳遞給 http-console 即可。
請注意我們這裡使用了 json 命令用來設置正確的 content-type:
?
1 2 3 4 5 6 7 8 $ http-console http://127.0.0.1:8000 The "sys" module is now called "util". It should have a similar interface. > http-console 0.6.1 > Welcome, enter .help if you're lost. > Connecting to 127.0.0.1 on port 8000. http://127.0.0.1:8000/> json http://127.0.0.1:8000/>訪問 REST 服務
在 http-console 中,要執行 GET 請求只需要輸入 GET /bookmarks 即可:
?
1 2 3 4 5 6 7 8 9 10 11 http://127.0.0.1:8000/> GET /bookmarks HTTP/1.1 200 OK Date: Sun, 01 Apr 2012 17:23:27 GMT Server: journey/0.4.0 Content-Type: application/json;charset=utf-8 Content-Length: 16 Connection: keep-alive { bookmarks: [] }你也可以使用 JSON 的片段來執行 POST 請求:
?
1 2 3 4 5 6 7 8 9 10 11 12 13 14 15 16 http://127.0.0.1:8000/> POST /bookmarks ... { "url": "http://nodejs.org" } HTTP/1.1 200 OK Date: Thu, 05 Apr 2012 11:45:55 GMT Server: journey/0.4.0 Content-Type: application/json;charset=utf-8 Content-Length: 91 Connection: keep-alive { bookmark: { _id: 'WD-G-1', resource: 'Bookmark', url: 'http://nodejs.org' } }然後再次執行 GET 請求,你就可以看到新插入的數據了:
?
1 2 3 4 5 6 7 8 9 10 11 12 13 14 15 16 17 18 http://127.0.0.1:8000/> GET /bookmarks HTTP/1.1 200 OK Date: Sun, 01 Apr 2012 17:23:27 GMT Server: journey/0.4.0 Content-Type: application/json;charset=utf-8 Content-Length: 16 Connection: keep-alive { bookmarks: [ { _rev: '1-cfced13a45a068e95daa04beff562360', _id: 'WD-G-1', resource: 'Bookmark', url: 'http://nodejs.org' } ] }相關文章
- background-color設置與代碼簡寫
- margin-left設置左邊距 CSS左外邊距設置
- margin-right css右外邊距 右外邊間隔
- js 自帶的 map() 方法全面了解
- Ajax 設置Access-Control-Allow-Origin實現跨域訪問
- jQuery插件FusionCharts實現的Marimekko圖效果示例【附demo源碼】
- 淺析JS中的 map, filter, some, every, forEach, for in, for of 用法總結
- ECMAScript6--解構
- ES6新數據結構Map功能與用法示例
- ES6(ECMAScript 6)新特性之模板字符串用法分析