HTML
首先載入jQuery庫文件和jquery.fly.min.js插件。
代碼如下:
<script src="jquery.js"></script>
<script src="jquery.fly.min.js"></script>
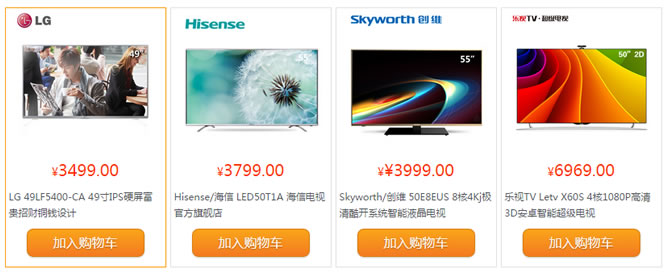
接著,將商品信息html結構布置好,本例中,我們用四個商品並排布置,每個商品box中包括有商品圖片、價格、名稱以及加入購物車按鈕等信息。
代碼如下:
<div class="box">
<img src="images/lg.jpg" width="180" height="180">
<h4>¥<span>3499.00</span></h4>
<p>LG 49LF5400-CA 49寸IPS硬屏富貴招財銅錢設計</p>
<a href="#" class="button orange addcar">加入購物車</a>
</div>
<div class="box">
<img src="images/hs.jpg" width="180" height="180">
<h4>¥<span>3799.00</span></h4>
<p>Hisense/海信 LED50T1A 海信電視官方旗艦店</p>
<a href="#" class="button orange addcar">加入購物車</a>
</div>
<div class="box">
<img src="images/cw.jpg" width="180" height="180">
<h4>¥<span>¥3999.00</span></h4>
<p>Skyworth/創維 50E8EUS 8核4Kj極清酷開系統智能液晶電視</p>
<a href="#" class="button orange addcar">加入購物車</a>
</div>
<div class="box">
<img src="images/ls.jpg" width="180" height="180">
<h4>¥<span>6969.00</span></h4>
<p>樂視TV Letv X60S 4核1080P高清3D安卓智能超級電視</p>
<a href="#" class="button orange addcar">加入購物車</a>
</div>
然後,我們還需要在頁面的右側加上購物車以及提示信息。
代碼如下:
<div class="m-sidebar">
<div class="cart">
<i id="end"></i>
<span>購物車</span>
</div>
</div>
<div id="msg">已成功加入購物車!</div>
CSS
我們使用CSS先將商品排列美化,然後設置右側購物車樣式,具體請看代碼:
代碼如下:
.box{float:left; width:198px; height:320px; margin-left:5px; border:1px solid #e0e0e0; text-align:center}
.box p{line-height:20px; padding:4px 4px 10px 4px; text-align:left}
.box:hover{border:1px solid #f90}
.box h4{line-height:32px; font-size:14px; color:#f30;font-weight:500}
.box h4 span{font-size:20px}
.u-flyer{display: block;width: 50px;height: 50px;border-radius: 50px;position: fixed;z-index: 9999;}
.m-sidebar{position: fixed;top: 0;right: 0;background: #000;z-index: 2000;width: 35px;height: 100%;font-size: 12px;color: #fff;}
.cart{color: #fff;text-align:center;line-height: 20px;padding: 200px 0 0 0px;}
.cart span{display:block;width:20px;margin:0 auto;}
.cart i{width:35px;height:35px;display:block; background:url(car.png) no-repeat;}
#msg{position:fixed; top:300px; right:35px; z-index:10000; width:1px; height:52px; line-height:52px; font-size:20px; text-align:center; color:#fff; background:#360; display:none}
jQuery
我們要實現的效果是,當用戶點擊“加入購物車”按鈕時,當前商品圖片會變成一個縮小的圓球,以按鈕為起點,向右側以拋物線的形式飛出,最後落入頁面右側的購物車裡,並提示操作成功。在飛出之前,我們要獲取當前商品的圖片,然後調用fly插件,之後的拋物線軌跡都是由fly插件完成,我們只需定義起點和終點等參數即可。
代碼如下:
<script>
$(function() {
var offset = $("#end").offset();
$(".addcar").click(function(event){
var addcar = $(this);
var img = addcar.parent().find('img').attr('src');
var flyer = $('<img class="u-flyer" src="'+img+'">');
flyer.fly({
start: {
left: event.pageX, //開始位置(必填)#fly元素會被設置成position: fixed
top: event.pageY //開始位置(必填)
},
end: {
left: offset.left+10, //結束位置(必填)
top: offset.top+10, //結束位置(必填)
width: 0, //結束時寬度
height: 0 //結束時高度
},
onEnd: function(){ //結束回調
$("#msg").show().animate({width: '250px'}, 200).fadeOut(1000); //提示信息
addcar.css("cursor","default").removeClass('orange').unbind('click');
this.destory(); //移除dom
}
});
});
});
</script>
復制上面的代碼,保存並運行即可看到效果,Fly插件的項目官網地址是:https://github.com/amibug/fly,值得一提的是,IE10以下需要添加以下js:
<script src="requestAnimationFrame.js"></script>
以上就是本文的全部內容了,希望大家能夠喜歡