玩Canvas玩了有兩三個禮拜了,平面的東西玩來玩去也就那樣,所以就開始折騰3D了。
因為Canvas畫布終究還是平面的,所以要有3D就得抽象出一個Z軸。然後再把3D坐標轉換成2D坐標,畫到畫布上,再通過旋轉等變換效果來產生3D感。做3D一般就是由點到線,然後由線到面。
【點】
點的話,之前我有寫過關於3D的博文 解析3D標簽雲,其實很簡單 ,這篇博文雖然講的是用div實現的3D標簽雲,但是追根到底產生的3D原理是一樣的,就是最簡單的由點構成的3D了。每一個標簽就是一個點。也可以直接看這個DEMO:
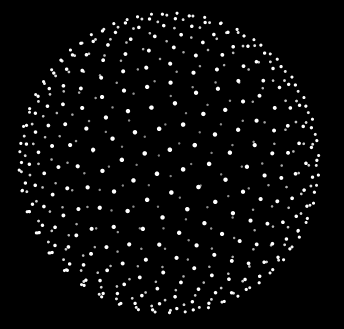
3DBall
裡面的總共有五百個點對象,每個點對象相應的根據他們的Z軸來改變他們的大小和透明度,再平均分布在球面上,就構成了點球體了。
【線】
如果知道怎麼做點之後,線也就容易了,只要把點連起來就行了。這個沒做DEMO,不過也確實不難。就循環moveTo,然後lineTo,線就出來了。
【面】
這篇博文主要講面滴。
二話不說,先上個DEMO吧 :
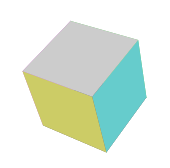
3D立方體
做一個立方體,我用了三個對象:點對象,面對象,以及立方體本身一個對象:
下面這個是點對象,x,y,z是點的三維坐標,_get2d方法是把三維坐標轉換到二維層面來。fallLength是焦距。
XML/HTML Code復制內容到剪貼板
var Vector = function(x,y,z){
this.x = x;
this.y = y;
this.z = z;
this._get2d = function(){
var scale = fallLength/(fallLength+this.z);
var x = centerX + this.x*scale;
var y = centerY + this.y*scale;
return {x:x , y:y};
}
}
然後是面對象:
面對象的屬性頁很容易理解,一個面就是一個正方形 , v1v2v3v4是面的四個頂點,zIndex這個屬性很重要,是代表這個面的層級,是在最外面還是在裡面,這個必須要有,這樣當用canvas畫的時候才能讓這個面畫在最前面,才不會被其他的面遮蓋。zIndex的值也很容易理解,就是頂點z軸坐標的平均值,其實也就是中心點的z軸坐標。顏色就是這個面的顏色啦。
XML/HTML Code復制內容到剪貼板
var Face = function(vector1,vector2,vector3,vector4,color){
this.v1 = vector1;
this.v2 = vector2;
this.v3 = vector3;
this.v4 = vector4;
this.color = color;
this.zIndex = (this.v1.z + this.v2.z + this.v3.z + this.v4.z)/4;
this.draw = function(){
ctx.save();
ctx.beginPath();
ctx.moveTo(this.v1._get2d().x , this.v1._get2d().y);
ctx.lineTo(this.v2._get2d().x , this.v2._get2d().y);
ctx.lineTo(this.v3._get2d().x , this.v3._get2d().y);
ctx.lineTo(this.v4._get2d().x , this.v4._get2d().y);
ctx.closePath();
// ctx.fillStyle = "rgba("+parseInt(Math.random()*255)+","+parseInt(Math.random()*255)+","+parseInt(Math.random()*255)+",0.2)";
ctx.fillStyle = this.color;
ctx.fill();
}
}
最後是立方體本身對象:
因為立方體最後要旋轉,所以,立方體對象裡面不僅有面對象,還要有點對象,點旋轉後才會引起面的旋轉。length是立方體的邊長,_initVector是初始化立方體的各個頂點,_draw方法就是把所有點形成面,將面放入數組,然後對面進行排序(就是根據面裡的zIndex排序),排序好後,調用每個面裡的draw方法。立方體就出來了。
XML/HTML Code復制內容到剪貼板
var Cube = function(length){
this.length = length;
this.faces = [];
this.vectors = [];
}
Cube.prototype = {
_initVector:function(){
this.vectors[0] = new Vector(-this.length/2 , -this.length/2 , this.length/2);
this.vectors[1] = new Vector(-this.length/2 , this.length/2 , this.length/2);
this.vectors[2] = new Vector(this.length/2 , -this.length/2 , this.length/2);
this.vectors[3] = new Vector(this.length/2 , this.length/2 , this.length/2);
this.vectors[4] = new Vector(this.length/2 , -this.length/2 , -this.length/2);
this.vectors[5] = new Vector(this.length/2 , this.length/2 , -this.length/2);
this.vectors[6] = new Vector(-this.length/2 , -this.length/2 , -this.length/2);
this.vectors[7] = new Vector(-this.length/2 , this.length/2 , -this.length/2);
},
_draw:function(){
this.faces[0] = new Face(this.vectors[0] , this.vectors[1] , this.vectors[3] , this.vectors[2] , "#6c6");
this.faces[1] = new Face(this.vectors[2] , this.vectors[3] , this.vectors[5] , this.vectors[4] , "#6cc");
this.faces[2] = new Face(this.vectors[4] , this.vectors[5] , this.vectors[7] , this.vectors[6] , "#cc6");
this.faces[3] = new Face(this.vectors[6] , this.vectors[7] , this.vectors[1] , this.vectors[0] , "#c6c");
this.faces[4] = new Face(this.vectors[1] , this.vectors[3] , this.vectors[5] , this.vectors[7] , "#666");
this.faces[5] = new Face(this.vectors[0] , this.vectors[2] , this.vectors[4] , this.vectors[6] , "#ccc");
this.faces.sort(function(a , b){
return b.zIndex - a.zIndex;
});
this.faces.foreach(function(){
this.draw();
})
}
}
立方體做好了,接下來就可以讓它動起來了。根據鼠標位置改變立方體轉動的角度。rotateX和rotateY方法就是讓所有點繞X軸旋轉以及繞Y軸旋轉。這個的原理我在之前那個博文上好像有說過。。。。如果想了解更多,可以自己去百度一下計算機圖形學3D變換。繞X軸和繞Y軸是最簡單的旋轉矩陣了。當然,如果有興趣的還可以去搜一下繞任意軸旋轉矩陣。。。這個有點復雜,我本來想用它來做個魔方,不過遇到一些問題,暫時還沒解決。好吧,扯遠了。通過rotateX和rotateY兩個方法可以讓每個點獲得下一幀的位置,在動畫循環中重繪。這樣,轉動的立方體就做出來了。
XML/HTML Code復制內容到剪貼板
if("addEventListener" in window){
window.addEventListener("mousemove" , function(event){
var x = event.clientX - canvas.offsetLeft - centerX;
var y = event.clientY - canvas.offsetTop - centerY;
angleY = x*0.0001;
angleX = y*0.0001;
});
}
else {
window.attachEvent("onmousemove" , function(event){
var x = event.clientX - canvas.offsetLeft - centerX;
var y = event.clientY - canvas.offsetTop - centerY;
angleY = x*0.0001;
angleX = y*0.0001;
});
}
function rotateX(vectors){
var cos = Math.cos(angleX);
var sin = Math.sin(angleX);
vectors.foreach(function(){
var y1 = this.y * cos - this.z * sin;
var z1 = this.z * cos + this.y * sin;
this.y = y1;
this.z = z1;
});
}
function rotateY(vectors){
var cos = Math.cos(angleY);
var sin = Math.sin(angleY);
vectors.foreach(function(){
var x1 = this.x * cos - this.z * sin;
var z1 = this.z * cos + this.x * sin;
this.x = x1;
this.z = z1;
})
}
cube = new Cube(80);
cube._initVector();
function initAnimate(){
cube._draw();
animate();
}
function animate(){
ctx.clearRect(0,0,canvas.width,canvas.height)
rotateY(cube.vectors);
rotateX(cube.vectors);
cube._draw();
if("requestAnimationFrame" in window){
requestAnimationFrame(animate);
}
else if("webkitRequestAnimationFrame" in window){
webkitRequestAnimationFrame(animate);
}
else if("msRequestAnimationFrame" in window){
msRequestAnimationFrame(animate);
}
else if("mozRequestAnimationFrame" in window){
mozRequestAnimationFrame(animate);
}
else {
setTimeout(animate , 16);
}
}
全部代碼我就不貼了,DEMO裡通過控制台都可以看到。我也沒引用其他什麼框架之類的,直接copy下來就能用了。
能寫好轉動的一個立方體後,多個立方體轉動也可以做出來了。
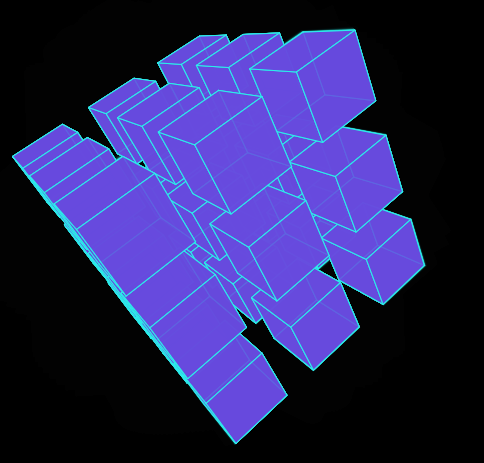
戳DEMO:面:3D立方體2 3D立方體線(這個純碎覺得沒有面更酷而已)